Custom Car Cameras: What a Project Actually Changes
Across taxi, van, truck, bus and specialty-vehicle projects, the request is almost never “a camera”. It is a camera that fits a recess no catalogue part was designed for, plugs into a harness that is already in the vehicle, and carries the buyer’s label. This is what a custom car-camera project changes, how one runs, and the parts that should stay standard.

Key takeaways
- Most custom requests are a housing, bracket, connector or lens change — not a new camera platform.
- Shrinking the head trades lens room, IR space and heat path; validate it on the vehicle, not just on the bench.
- The connector and harness should be specified with the camera; they decide whether the installation survives.
- Change the outside freely; change the sensor, ISP, power protection and sealing only with a test plan.
A “custom car camera” can mean a new housing, a different bracket, a longer lead or a label on the box. Those are very different projects. Across the projects we handle, almost every request lands in one of six buckets, and naming the bucket in the first conversation is what keeps a small change from turning into a tooling programme.
1. Custom usually means one of six changes

| What changes | Typical request | Effort |
|---|---|---|
| Housing and head size | A shorter or narrower body to fit behind a mirror, inside a pillar or into a recess | New tooling and a full validation cycle |
| Mount or bracket | A different angle, offset, screw pattern or quick release | Usually the fastest change |
| Connector and harness | 4-pin aviation instead of RCA/DC, a longer lead, a coiled lead, a sealed boot | Fast if the standard options fit |
| Optics and IR | A wider or narrower field of view, or a different IR arrangement | Requires focus and night testing |
| Software defaults | Mirror image, parking guidelines, OSD language, default brightness | Configuration, not hardware |
| Branding and packaging | Laser etching, label, box, manual, barcode | Low risk, but artwork must be approved |
The list also works as a scope document. A buyer who asks for “a custom camera” and a supplier who quotes “a custom camera” are often picturing different rows of that table. The first useful question is not “what resolution?” but “which of these six things has to be different from the standard unit?”
2. The head size is a system decision
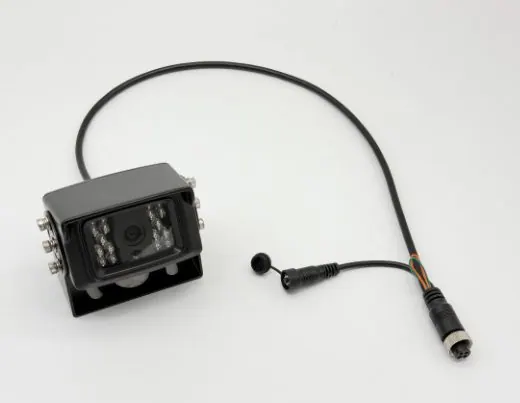
The small-head request is the most common one we see, and it is the least cosmetic. The camera has to fit where the vehicle gives it room: behind a mirror, inside a pillar trim, under a cab roof or in a recess beside a door. When the housing shrinks, four things shrink with it.
- Lens room. The lens needs a back-focus distance and a barrel that can be focused and locked. Shortening the body removes the space for both.
- IR space. The LEDs have to sit around the lens without throwing light back into it. A tiny window forces a different LED layout, not just a smaller one.
- Heat path. The sensor and the ISP generate heat, and the housing is part of the path that removes it. A sealed head with less metal runs hotter.
- Sealing and mounting. The front window, the cable entry and the bracket bosses all need a face to sit on. Every one of them has to survive the same pressure wash as a full-size body.
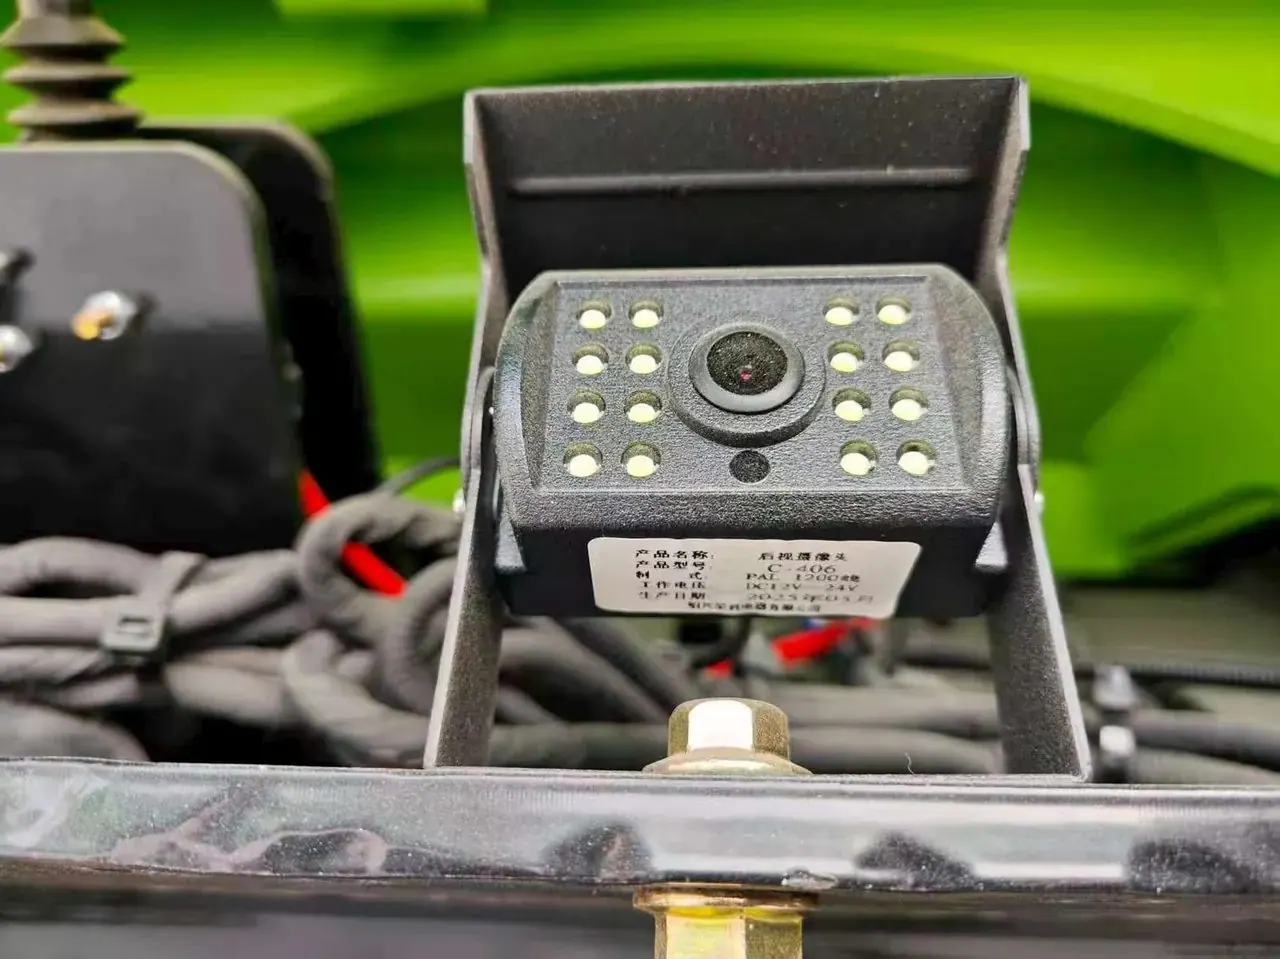
A smaller head is therefore not a scaled-down drawing of a larger one. It is a new mechanical design with its own validation. We build these with our supplier partners and test them on the vehicle, because a bench test will not show the heat soak behind a windscreen or the vibration on a mirror arm. The compact units in our car camera range exist for exactly these recesses, and the same discipline applies to truck cameras mounted in tight positions.
3. The connector and harness are part of the product

A camera that works on the bench and fails in service usually fails at the connector, not at the lens. The plug is the part that is mated and unmated, exposed to water and pulled by the harness. It should be specified with the camera, not treated as an accessory.
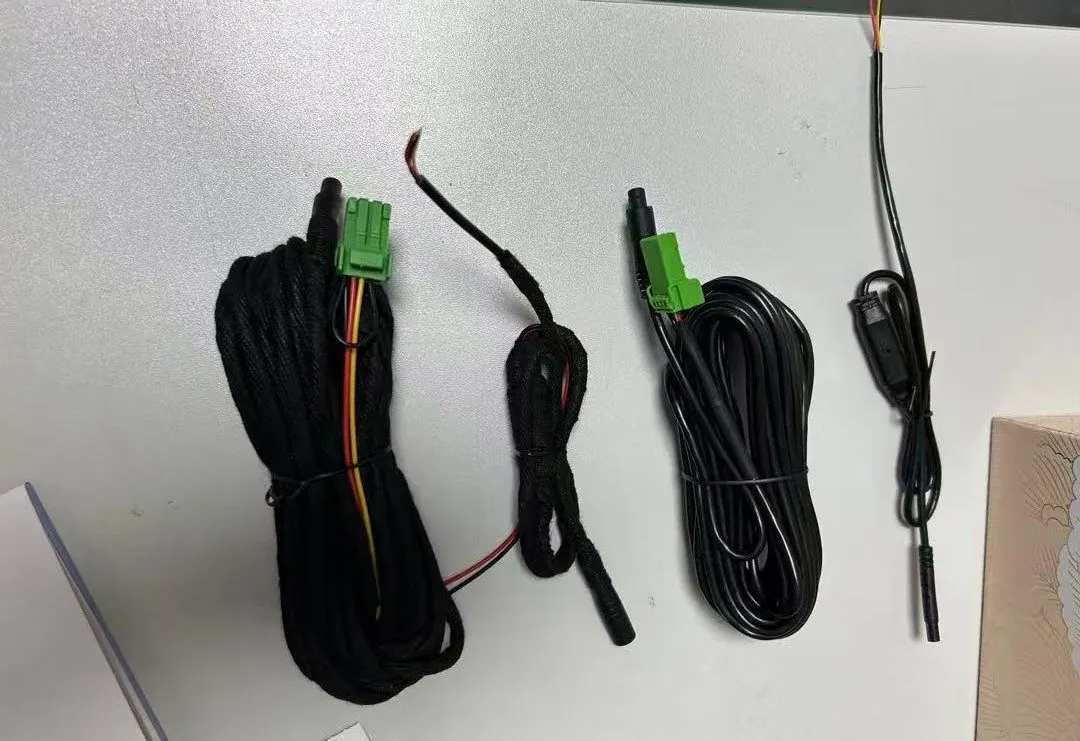
The 4-pin aviation connector is the default on commercial vehicles for a reason: it locks, it seals and it survives repeated coupling. RCA and DC pigtails are fine for aftermarket kits and short runs, but they are not the specification that lasts on a fleet. If the vehicle already has a harness, the question is not which plug we prefer — it is which plug is already there, what the pinout is, and whether the boot seals around the cable. The failure modes are covered in the MDVR wiring guide.
Cable length belongs to the same decision. A lead that is too short puts tension on the plug; a lead that is too long needs a service loop that does not rub. A coiled lead is useful where the camera moves, or where the cable would otherwise hang. The camera interface range covers the plugs, adapters and leads that go with these builds.
4. The bracket decides whether the camera survives

The bracket is the cheapest part of a custom camera and the most common cause of a warranty claim. It sets the angle, holds the camera against vibration and decides whether the unit can be adjusted without removing trim.
Three things matter more than the shape. First, the angle has to be adjustable at installation, because the same vehicle model is not built to the same tolerance twice. Second, the bracket has to spread the load: a single screw through a plastic panel will crack or work loose. Third, the camera has to be serviceable — if replacing it means removing a headliner, the next failure costs far more than the part.
That is why a bracket-only change is usually the fastest custom request we take on. It does not touch the optical design or the housing tooling, and it can often be validated with a printed prototype on a real vehicle before any production tool is cut.
5. Change the field of view deliberately
A wider lens shows more of the vehicle and less detail at the distance that matters; a narrower lens does the opposite. That trade is arithmetic, not taste, and it is worked through in field of view and lens angle.
What changes in a custom project is where the limit sits. A lens can be changed within the platform, but the new lens has to be focused and locked, checked at temperature, and checked at night with the IR arrangement that will ship with it. A lens that is sharp on the bench can go soft in a hot cab, and an IR layout that suits one field of view can throw light back into the window at another.
This is also where buyers ask for a different sensor. A different sensor is a different platform: new ISP tuning, new low-light behaviour, new power and new validation. That can be the right project, but it is not a lens change and should not be quoted as one.
6. Software defaults and branding freeze the product
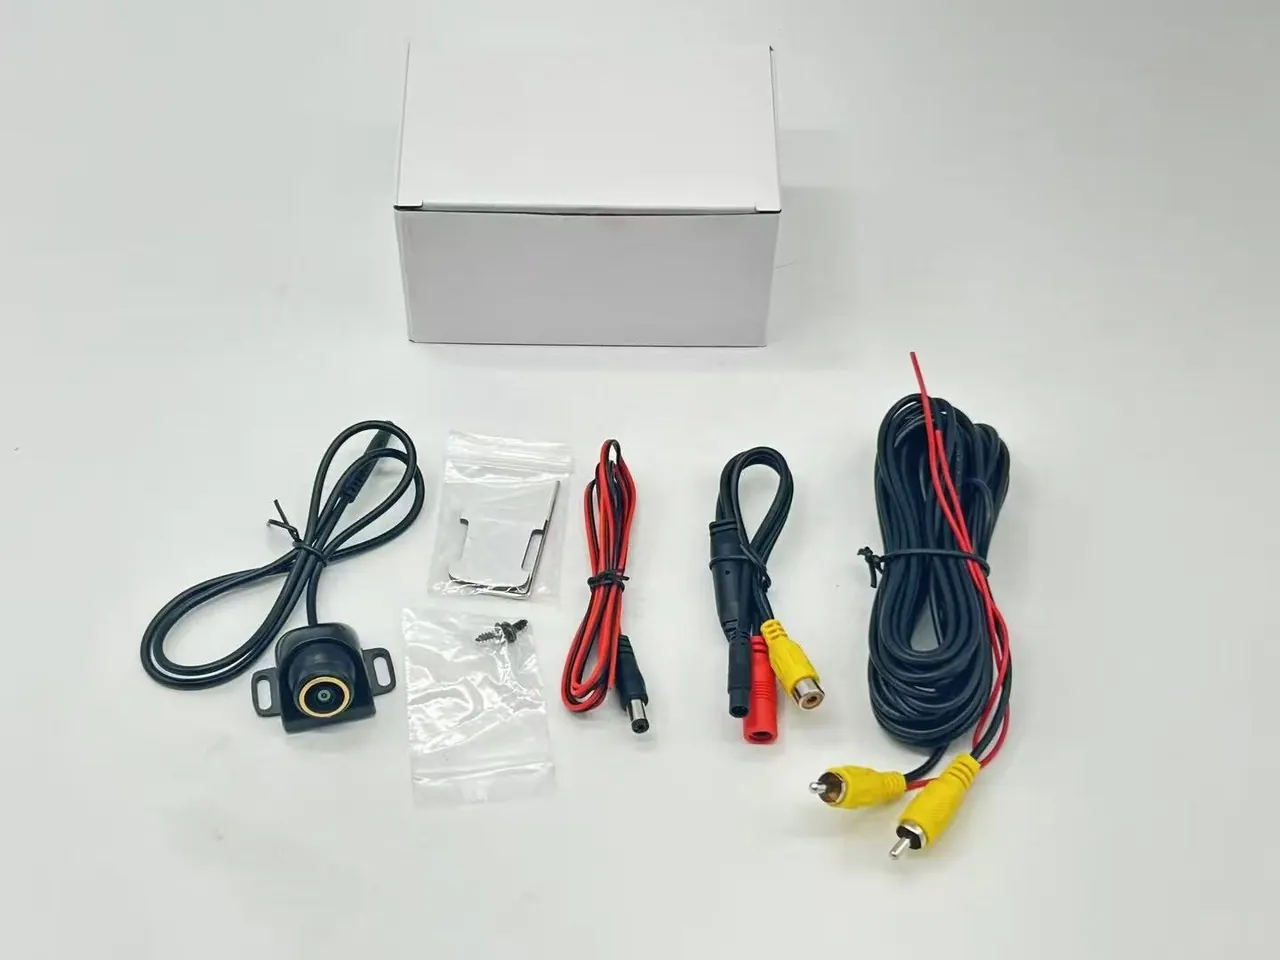
Some of the most expensive mistakes are settings, not hardware. Mirror image, parking guidelines, on-screen language, default brightness and trigger behaviour are all set before the unit ships and then forgotten. If they are wrong, every unit in the batch comes back — and the fix is a configuration file, not a new camera.
Branding belongs in the same conversation. Laser etching, a printed label, a retail box, a manual and a barcode are low-risk changes compared with tooling, but they still need approved artwork, a defined position and permission to use the trademark. A logo on the housing is a product decision; a logo on the box is a packaging decision; both should be frozen before the pilot batch.
7. How a custom project runs
The projects that go smoothly follow the same sequence, whether the change is a bracket or a complete housing.
- Survey the vehicle. Photograph the position, measure the recess, note the trim, the voltage and the existing harness. A drawing of the vehicle is not a substitute for the actual recess.
- Freeze the change list. Write down what changes and what stays standard. This is the document that prevents scope creep later.
- Build a prototype. Print the bracket, modify the housing or fit the sample head. The prototype exists to fail cheaply, on the vehicle, before tooling.
- Validate on the bench and on the vehicle. Focus, night image, heat soak, vibration, sealing, connector retention and monitor behaviour — the bench covers some, the vehicle covers the rest.
- Run a pilot batch. A small batch on real vehicles finds the assembly and handling problems that a single sample hides.
- Release the pack. Freeze the drawing, the harness length, the label artwork, the software defaults and the test record, so the next batch is the same product.
The same sequence underpins the questions in the truck camera guide, because a custom unit still has to answer them — position, resolution, environment, voltage, connection, warning, recording and cost of ownership.
8. What we keep standard, and why

Not everything should be customizable. The parts below stay standard unless the volume and the test plan justify a change.
- Sensor and ISP platform. A proven platform has known low-light behaviour and known tuning. Changing it for a small batch adds risk that the buyer cannot see on a datasheet.
- Power protection. 12 V and 24 V vehicles, load dump and reverse polarity are solved problems on a standard platform. A custom power board is a new failure mode.
- Sealing method. The gasket, the front-window bond and the cable entry are validated together. A new housing has to repeat that validation, not assume it.
- Connector standard. The plug and pinout should follow what the fleet already uses; inventing a new one creates a spare-part problem.
- Cable gauge and shield. Video and power need the right conductor and shield for the length. A thinner cable is not a customization; it is a fault waiting for a long run.
We are a supply-chain integrator, not a factory, and that shapes the advice. We specify the change, match it to a platform that already works, sample it with our supplier partners and validate it with the buyer. The value is in choosing which parts to change — not in changing all of them.
9. What these photographs show

The photographs in this article come from a recent compact-head customization project. They show the parts that decide whether a custom camera is a product or a prototype: the head and its bracket, the 4-pin aviation connector, the harness and its strain relief, a sealed cable in the field, and the coiled lead that keeps a service loop tidy.
They also show what a photo set cannot prove. There is no vehicle, no monitor and no night image in this set, so this article does not claim a field result from them. The images are evidence of the hardware we specify and handle; the validation of a specific unit comes from the bench and vehicle records for that project.
10. What to send us for a project quote
A useful first message for a custom car-camera project contains six things:
- The vehicle type and the mounting position, with a photo and the recess dimensions.
- The monitor or recorder it connects to, and the vehicle voltage.
- The connector already in the vehicle, or a photo of the plug and pinout.
- The field of view, or the distance the driver has to see.
- The change you need — housing, bracket, lead, lens, software or branding.
- The quantity and the market, because certification and packaging follow the market.
With those six, the first answer can be a real scope and a sample plan instead of a generic quotation. Without them, every supplier is guessing — and the guessing is what turns a custom project into a long one.
Frequently asked questions
What can be customized on a car camera?
Six things in practice: the housing and head size, the bracket, the connector and harness, the optics and IR arrangement, the software defaults, and the branding or packaging. Each has a different effort and risk — a bracket change and a new housing are not the same project.
Does a smaller camera head reduce image quality?
Not automatically, but it removes space for the lens, the IR LEDs and the heat path. A compact head has to be designed and validated as a new mechanical unit; a scaled-down drawing will usually lose focus stability, night performance or sealing.
Can you match the connector that is already in our vehicles?
Usually yes, if we can see the plug, the pinout and the cable length. Matching the shell is not enough: the pins, the sealing boot and the strain relief have to match too. Send a photo of the plug and, where possible, the mating half.
Can you put our logo on the camera and the box?
Yes. Laser etching, labels, boxes and manuals are low-risk changes compared with tooling, but they need approved artwork, a defined position and permission to use the trademark. Freeze the artwork before the pilot batch.
What is the quickest custom change?
A bracket, a lead length or a software default. None of them touches the optical design or the housing tooling, so they can usually be sampled quickly. A new housing is the slowest because it needs tooling and a full validation cycle.
Related articles
01. How to Choose a Truck Camera: The Complete Buyer's Guide
A practical guide to specifying commercial vehicle cameras: position, resolution, viewing angle, night vision, waterproof rating and connector type.
Read guide 6 min read
02. How Far Will a Camera Actually See? Focal Length, Sensor Size and Field of View, Worked Out
Focal length, sensor size and field of view worked out: how far a camera sees, what lens reads a plate at 10 m, and the mounting blind strip.
Read guide 11 min read
13. The Wiring Mistake That Kills Monitors in MDVR Installations — And the Zero-Cost Fix
Why monitors fail months after an MDVR installation: power feed through the shared aviation cable, and the wiring change that isolates the two.
Read guide 8 min readLooking for a reliable camera system supplier?
Tell us your vehicle type and application — we will recommend the right system and quote within 24 hours. Distributors and OEM/ODM projects welcome.