
Bright Light and Camera Sensors: Burn, Bloom or Crack?
A fleet returns ten cameras. Four show a white wash across the picture, four have a thin curved line drawn over the image, one is dead, and one has a video of the fault. The natural conclusion is that the light burned the sensors. Sometimes that is right — but the three symptoms have three different causes, and only one of them is sensor damage.

Key takeaways
- A white wash that moves with the light is veiling glare, not damage — clean the window, fit a hood, re-aim.
- A thin curved line fixed in the frame with colour fringing is a crack or scratch in the front window.
- A burned sensor leaves a fixed spot or dead-pixel cluster where the sun sat; nothing else does.
- A camera that dies within an hour while others run for days is a supply or unit failure, not a light burn.
Three symptoms that arrive in the same complaint
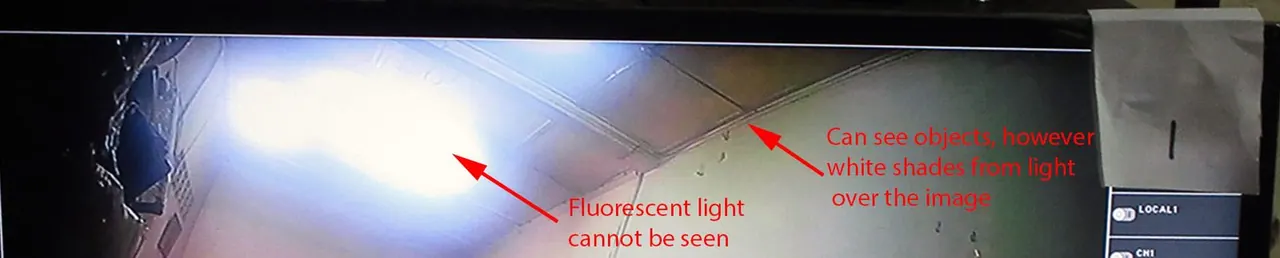

The phrase “the light burned the camera” covers at least three distinct failures. They look similar in a photograph of a monitor, and they need completely different answers: one is a lens and glare problem, one is damage to the front window, and one is a dead unit.
| What the driver sees | Where it sits in the frame | Most likely cause |
|---|---|---|
| A white bloom or haze around a lamp, with streaks across the image | Moves when the camera or the light moves | Veiling glare and flare — no sensor damage |
| A thin curved line, often with colour fringing along one side | Fixed in the same place in every scene | A crack or scratch in the front window or lens |
| A small bright or dark spot, or a cluster of dead pixels | Fixed, and often exactly where the sun sat | Sensor damage — a real burn |
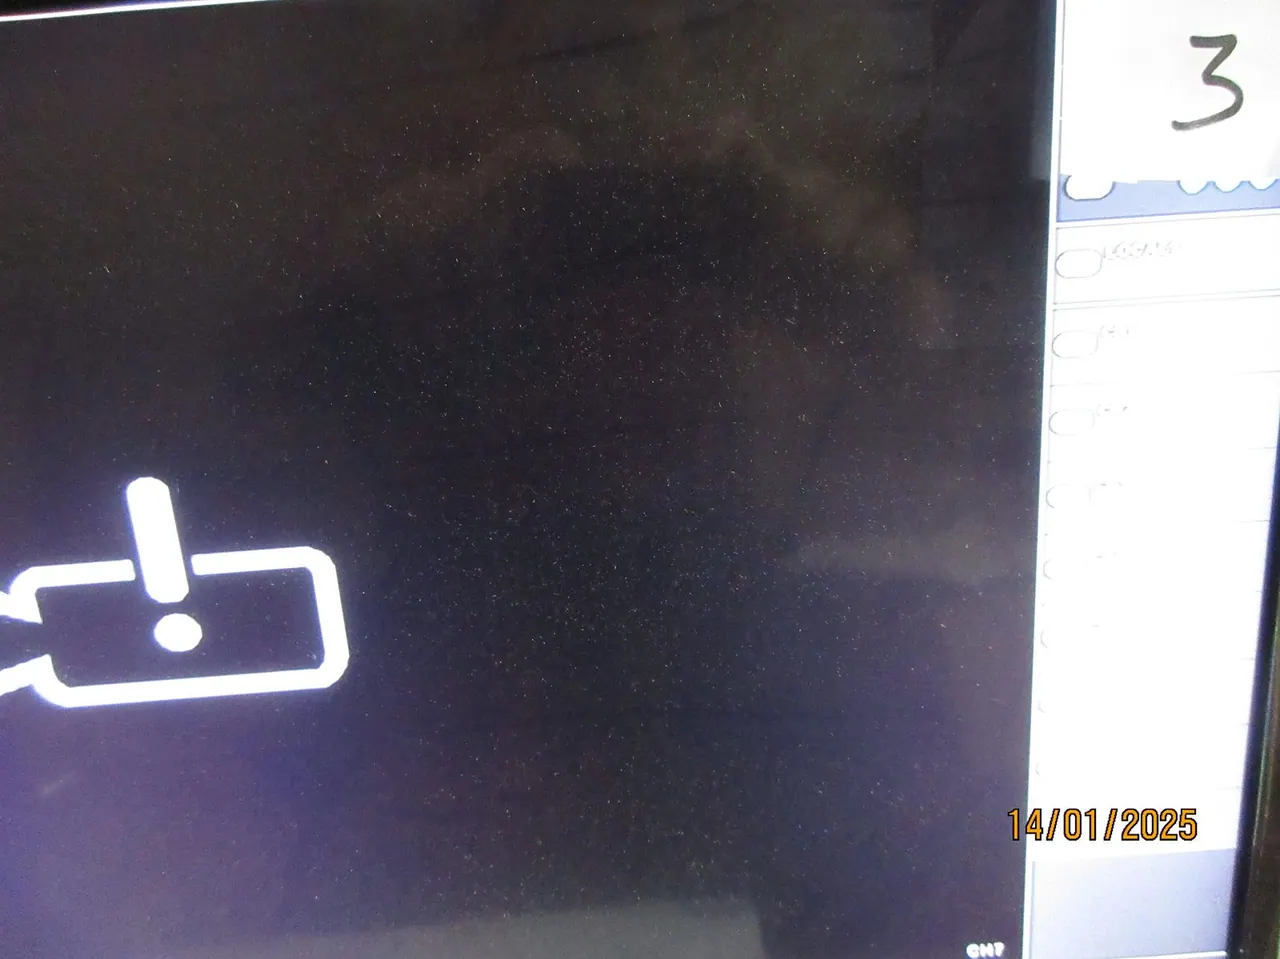
| No picture at all after minutes or hours of use | Nowhere — the channel is dead | Power, connector or thermal failure |
The order matters. Glare and a cracked window are far more common than a burned sensor, and both are usually reported in the same words. Before replacing a camera, identify which row of that table the picture belongs to.
What a lens can actually do to a sensor
A lens does concentrate light. Sunlight arrives at roughly 1000 W per square metre; a 6 mm F1.0 lens collects about 28 mW of it and focuses that into a spot a few micrometres across. The resulting irradiance at the sensor is high enough to damage the colour filter array or the photodiodes if it is held there long enough.
That is why a camera pointed at the sun — or at a mirror image of the sun — for hours can develop a permanent defect. The signature is specific: a fixed spot or a small cluster of dead pixels, in the position where the sun sat, present in every scene.
The signature of a burn is not a white wash over the whole picture, and it is not a curved line. A damaged photodiode does not smear across the frame. If the whole image is washed out, the sensor is doing its job and the light is simply overwhelming the scene.
Lasers are a separate case. A direct laser hit can destroy a sensor in milliseconds, and no camera rated for vehicle use is protected against it. If the site uses laser levels, laser scanners or stage lighting, treat the camera as a consumable in that area.
The white wash is glare, not damage

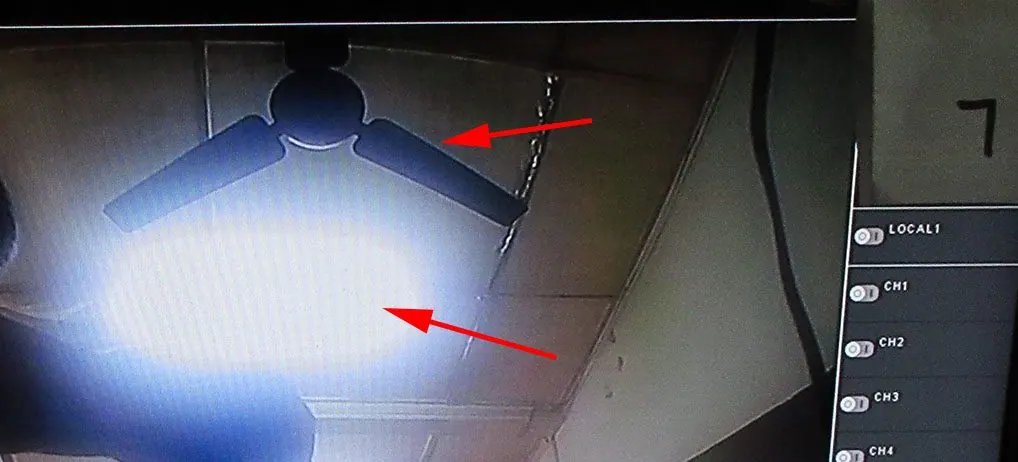
A bright lamp inside or just outside the frame scatters inside the lens and across the front window. The result is veiling glare: a haze that lifts the blacks, a bloom around the source, and streaks along the lens surfaces. Dust and a fingerprint make it much worse, and the effect appears on any vehicle camera pointed at a lamp.
Auto-exposure then finishes the job. The camera closes down to protect the highlight, and the rest of the scene goes dark — which is why the driver reports that “the light cannot be seen and everything else disappeared”.
This is reversible. Move the camera a few degrees off the source, fit a hood, clean the window, and the picture returns. If the wash moves when the light moves, nothing has been damaged.
The curved line is a surface defect
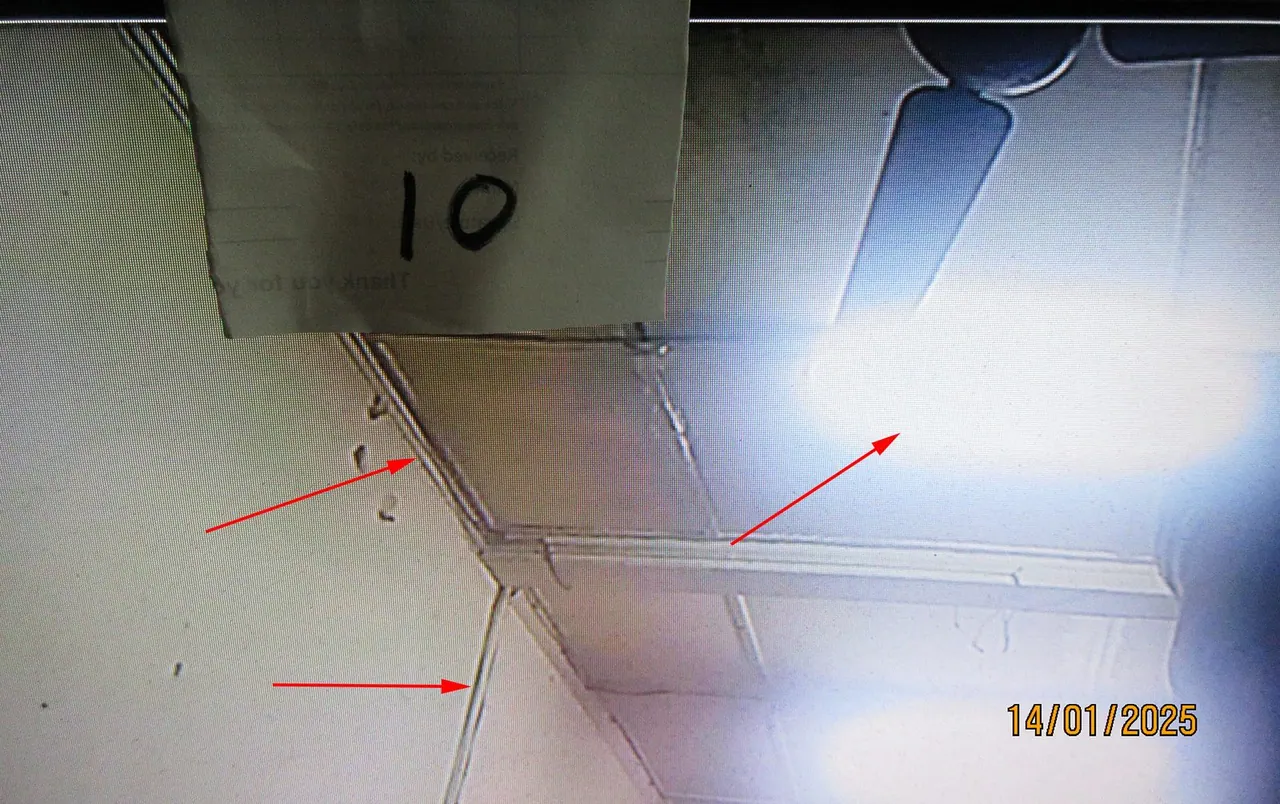

The thin arc that appears in several of the returned units behaves differently from glare. It stays in the same place when the scene changes, it crosses objects that are metres apart, and it carries colour fringing along one edge. That combination points to the optical surface, not the electronics.
A crack, a deep scratch, a moulding flaw or a delaminating front window bends the light before it reaches the sensor. The line you see is the edge of that bend. It is permanent, and no amount of cleaning removes it.
Cracks like this rarely come from light. More common causes are an impact during fitting, a housing screw tightened against the window, a stone at the front of a truck, or repeated heating and cooling of a sealed unit. A camera that left the factory intact can develop one after a few weeks in service.
What kills a camera within an hour

One unit in the same return was dead after about an hour of testing, while the others ran for two days. That pattern is not a light problem. It is a unit-level electrical or thermal failure: reverse polarity, an over-voltage spike on a 24 V vehicle, a short in the pigtail, or water in the connector.
The 24 V supply is the first thing to check. A camera rated for 12 V that sees 24 V will run for a while and then fail, and a vehicle that is jump-started or has a load dump can push a spike through a camera that was fine at commissioning. The IP rating covers water, not voltage.
The ten-minute bench test

These five steps separate the four causes without opening the housing. They work on a returned JPC-04 28mm and, with a helper, on a vehicle in the yard.
- Cover the lens. A black frame means the sensor and the signal chain are alive; a white or noisy frame points to the electronics.
- Point at a plain wall and note whether the defect stays in exactly the same place. Fixed means sensor or optical surface; moving means glare.
- Clean the front window with a soft cloth and re-check. If the line is unchanged, it is under the surface or inside the glass.
- Shine a torch at a steep angle across the window. A crack or scratch catches the light as a bright line; a clean window does not.
- Swap the camera onto a known-good cable and supply. If the fault follows the camera, it is the unit; if it stays with the vehicle, it is the wiring.
A burned sensor shows up in step two as a fixed spot that survives cleaning and does not move with the light. That is the only result in this list that justifies replacing the camera for light damage.
Preventing it in the first place
- Aim away from the sun path. A camera that looks east or west at a shallow angle will spend part of the year staring into the sun; a few degrees of change removes hours of exposure a day.
- Fit a hood. A hood that shades the front window cuts both flare and direct sun load, and it costs less than a replacement camera.
- Keep the window clean. Dust turns a manageable highlight into a full-frame wash, and it is the most common reason a “faulty” camera looks fine on the bench.
- Protect the supply. Fuse the camera separately, keep the pigtail away from the starter and alternator loom, and check the voltage at the connector rather than at the battery.
- Record the position of any permanent spot. A photo of the monitor with the date lets you tell a new burn from an old one at the next service.
Frequently asked questions
Can strong light really burn a camera sensor?
Yes, if the sun is focused onto the sensor for a long enough period — typically a camera pointed at the sun for hours. The result is a fixed spot or a small cluster of dead pixels where the sun sat. A white wash across the whole picture, or a thin curved line, is not that.
Why does the image go white when a light is in view?
That is veiling glare plus auto-exposure. Light scatters inside the lens and across the front window, lifting the blacks and blooming around the source, and the camera then reduces exposure to protect the highlight, which darkens everything else. Cleaning the window, fitting a hood and aiming a few degrees off the source usually fixes it.
What causes a thin curved line across the picture?
Almost always the optical surface: a crack, a deep scratch, a moulding flaw or a delaminating front window. It stays fixed in the frame, crosses objects at different distances and shows colour fringing along one edge. Cleaning does not remove it, and the camera has to be replaced or the window replaced.
A camera died after an hour — was it the light?
Unlikely. A failure that fast, while identical units run for days, points to the supply or the unit: reverse polarity, an over-voltage spike, a short in the pigtail or water in the connector. Measure the voltage at the camera connector and swap the unit onto a known-good cable before blaming the light.
Related articles
06. Night Vision for Commercial Vehicles: How to Read Lux and IR Specifications
How infrared night vision works on vehicle cameras: lux ratings, 650 versus 850 nm LEDs, IR range, backscatter and why housing design decides image quality.
Read guide 5 min read
05. IP69K vs IP68 vs IP67: What Vehicle Camera Ratings Really Mean
What IP ratings actually test, why IP68 and IP69K are not comparable, why IP69K matters for pressure-washed fleets, and what the rating does not cover.
Read guide 5 min read
04. Camera Sensor Guide: 2053, 8536H, 307 — What the Chipset Numbers Mean
How to read a vehicle camera datasheet: sensor size, what chipset numbers such as 2053, 8536H and 307 actually mean, lens construction, WDR and IR-CUT filters.
Read guide 6 min readLooking for a reliable camera system supplier?
Tell us your vehicle type and application — we will recommend the right system and quote within 24 hours. Distributors and OEM/ODM projects welcome.